Lesson #02: Multi-signature Transactions
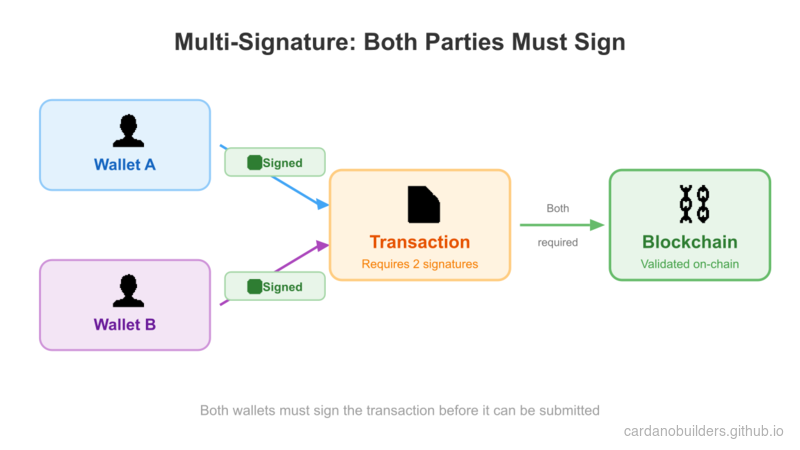
A multi-signature (multi-sig) transaction requires multiple parties to sign before it can be submitted to the blockchain. Multi-sig works like a joint account where all required parties must approve spending. Transactions can require two or more signers, which can be wallets or scripts.
In this lesson, you will:
- Build multi-signature transactions to mint a token
- Set up a NextJS app with a web interface to interact with the Cardano blockchain
Source code: GitHub
System setup
Download CIP30 Wallet Extension
You need a browser wallet extension that supports the CIP30 standard. Choose and install one from the Cardano developer showcase.
After installing, restore the wallet using the seed phrase you created in the previous lesson.
Set Up NextJS and Mesh
Create a new NextJS application:
npx create-next-app@latest --typescript mesh-multisigFollow the prompts:
Need to install the following packages:
Ok to proceed? (y)

✔ Would you like to use ESLint? … Yes
✔ Would you like to use Tailwind CSS? … Yes
✔ Would you like your code inside a `src/` directory? … Yes
✔ Would you like to use App Router? … No
✔ Would you like to use Turbopack for next dev? … No
✔ Would you like to customize the import alias (@/* by default)? … No
Navigate to the newly created folder:
cd mesh-multisigInstall the latest version of Mesh:
npm install @meshsdk/core @meshsdk/reactAdd MeshProvider
Wrap your application with MeshProvider to enable Mesh React components. Open src/app/layout.tsx and add:
import "@/styles/globals.css";
import type { AppProps } from "next/app";
import "@meshsdk/react/styles.css";
import { MeshProvider } from "@meshsdk/react";

export default function App({ Component, pageProps }: AppProps) {
  return (
    <MeshProvider>
      <Component {...pageProps} />
    </MeshProvider>
  );
}
Add CardanoWallet Component
Add a wallet component for blockchain interaction. Replace the contents of src/pages/index.tsx with:
import { CardanoWallet, useWallet } from "@meshsdk/react";

export default function Home() {
  const { wallet, connected } = useWallet();
  return (
    <div>
      <CardanoWallet isDark={true} />
    </div>
  );
}
Start the development server:
npm run devVisit http://localhost:3000 to view your application. Press CTRL+C to stop the server.
You should see a “Connect Wallet” component. Try connecting to your wallet.
Minting Script
This section walks through creating a minting script for a multi-signature token mint.
Define the Minting Script
Set up constants for the minting script:
const provider = new BlockfrostProvider("YOUR_KEY_HERE");

const demoAssetMetadata = {
  name: "Mesh Token",
  image: "ipfs://QmRzicpReutwCkM6aotuKjErFCUD213DpwPq6ByuzMJaua",
  mediaType: "image/jpg",
  description: "This NFT was minted by Mesh (https://meshjs.dev/).",
};

const mintingWallet = ["your", "mnemonic", "...", "here"];- Replace
YOUR_KEY_HEREwith your Blockfrost API key. - Define asset metadata in
demoAssetMetadata. - Use a mnemonic for the minting wallet.
Create Minting Application Wallet
Create a function to build the minting transaction:
async function buildMintTx(inputs: UTxO[], changeAddress: string) {
  const wallet = new MeshWallet({
    networkId: 0,
    key: {
      type: "mnemonic",
      words: mintingWallet,
    },
  });

  const { pubKeyHash: keyHash } = deserializeAddress(
    await wallet.getChangeAddress()
  );
}inputs: UTxOs from your wallet to pay minting fees.- Initialize the wallet with the mnemonic.
- Derive the
pubKeyHashfor the minting script.
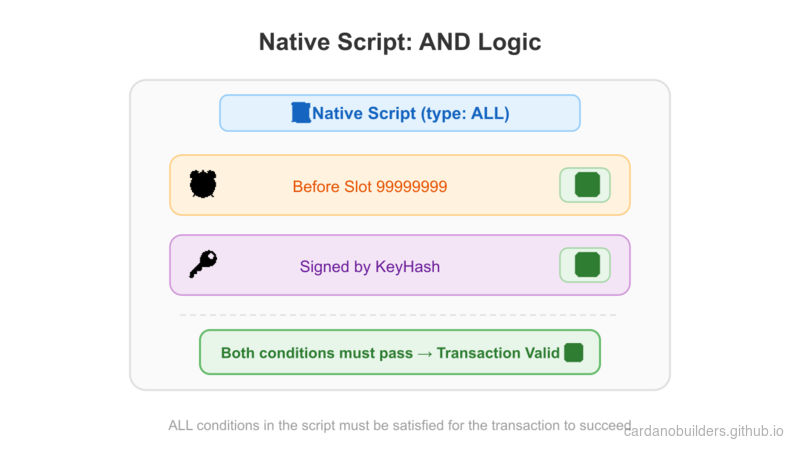
Create Native Script
Define the native script:
const nativeScript: NativeScript = {
  type: "all",
  scripts: [
    {
      type: "before",
      slot: "99999999",
    },
    {
      type: "sig",
      keyHash: keyHash,
    },
  ],
};
const forgingScript = ForgeScript.fromNativeScript(nativeScript);nativeScript: Parameters for the script.ForgeScript.fromNativeScript: Create the forging script.
Define Asset Metadata
Set up asset metadata:
const policyId = resolveScriptHash(forgingScript);
const tokenName = "MeshToken";
const tokenNameHex = stringToHex(tokenName);
const metadata = { [policyId]: { [tokenName]: { ...demoAssetMetadata } } };policyId: Derived from the forging script.tokenName: Name of the token.metadata: Asset metadata.
Create Transaction
Build the minting transaction:
const txBuilder = new MeshTxBuilder({
  fetcher: provider,
  verbose: true,
});

const unsignedTx = await txBuilder
  .mint("1", policyId, tokenNameHex)
  .mintingScript(forgingScript)
  .metadataValue(721, metadata)
  .changeAddress(changeAddress)
  .invalidHereafter(99999999)
  .requiredSignerHash(keyHash)
  .selectUtxosFrom(inputs)
.complete();mint: Add token details.mintingScript: Attach the minting script.metadataValue: Add asset metadata.changeAddress: Specify the change address.invalidHereafter: Set transaction expiry.selectUtxosFrom: Use UTxOs for fees.requiredSignerHashto declare that the minter wallet pub key hash is required.complete: Finalize the transaction.
Sign the Transaction
Sign the transaction with the minting wallet:
const signedTx = await wallet.signTx(unsignedTx, true);Source code
Here is the complete code for building the minting transaction:
async function buildMintTx(inputs: UTxO[], changeAddress: string) {
  // minting wallet
  const wallet = new MeshWallet({
    networkId: 0,
    key: {
      type: "mnemonic",
      words: mintingWallet,
    },
  });

  const { pubKeyHash: keyHash } = deserializeAddress(
    await wallet.getChangeAddress()
  );

  // create minting script
  const nativeScript: NativeScript = {
    type: "all",
    scripts: [
      {
        type: "before",
        slot: "99999999",
      },
      {
        type: "sig",
        keyHash: keyHash,
      },
    ],
  };
  const forgingScript = ForgeScript.fromNativeScript(nativeScript);

  // create metadata
  const policyId = resolveScriptHash(forgingScript);
  const tokenName = "MeshToken";
  const tokenNameHex = stringToHex(tokenName);
  const metadata = { [policyId]: { [tokenName]: { ...demoAssetMetadata } } };

  // create transaction
  const txBuilder = new MeshTxBuilder({
    fetcher: provider,
    verbose: true,
  });

  const unsignedTx = await txBuilder
    .mint("1", policyId, tokenNameHex)
    .mintingScript(forgingScript)
    .metadataValue(721, metadata)
    .changeAddress(changeAddress)
    .invalidHereafter(99999999)
    .requiredSignerHash(keyHash)
    .selectUtxosFrom(inputs)
    .complete();

  const signedTx = await wallet.signTx(unsignedTx, true);
  return signedTx;
}
Execute the transaction
With the minting transaction built, execute it from the frontend:
async function mint() {
  if (connected) {
    const inputs = await wallet.getUtxos();
    const changeAddress = await wallet.getChangeAddress();

    const tx = await buildMintTx(inputs, changeAddress);
    const signedTx = await wallet.signTx(tx, true);

    const txHash = await wallet.submitTx(signedTx);
    console.log("Transaction hash:", txHash);
  }
}- Check wallet connection.
- Get UTxOs and change address.
- Build, sign, and submit the transaction.
Source Code Walkthrough
This section explains the overall architecture of the multi-sig minting app, how the files connect, and how these blockchain concepts map to web development patterns you already know.
Project Structure
02-multisig/
├── package.json              # NextJS app with @meshsdk/core and @meshsdk/react
├── src/
│   └── pages/
│       ├── _app.tsx          # MeshProvider wrapper (enables wallet context)
│       └── index.tsx         # Main page: wallet UI, buildMintTx, and mint logic
└── ...                       # Standard NextJS files (config, styles, etc.)
This is a NextJS Pages Router application with two key files you wrote:
- _app.tsx wraps the entire application in
MeshProvider, which is a React context provider. This is the same pattern as wrapping your app in an auth provider or a theme provider — it makes wallet state (connection status, wallet methods) available to every component via theuseWallethook. - index.tsx contains all the business logic in a single page. It renders the
CardanoWalletconnect button, definesbuildMintTx(which constructs and partially signs the minting transaction server-side), and definesmint(which orchestrates the full flow from the browser).
The separation matters: _app.tsx is pure infrastructure (you set it once and forget it), while index.tsx is where the domain logic lives.
Multi-Sig Minting Flow
The key insight is the two-step signing. Unlike Lesson 1 where a single wallet signed everything, multi-sig requires both wallets to sign the same transaction before it is valid:
- Build — The app constructs the transaction using UTxOs from the browser wallet (which pays the fees) and a native script derived from the minting wallet’s key hash.
- First signature — The minting wallet (server-side, from mnemonic) partially signs the transaction. The
trueparameter inwallet.signTx(unsignedTx, true)means “partial sign” — the transaction is not yet complete. - Second signature — The browser wallet (CIP-30, user-facing) also partially signs. Now both required signatures are present.
- Submit — The fully signed transaction goes to the blockchain.
The native script enforces that both signatures must be present. If either is missing, the blockchain rejects the transaction.
Web2 Equivalents
| Cardano Concept | Web2 Equivalent | Explanation |
|---|---|---|
| Multi-sig transaction | Multi-factor approval (e.g., two-person wire transfer) | Requires multiple independent parties to authorize an action before it executes. Like requiring both a manager and finance to approve a large purchase order. |
| Native script | Business rules / policy engine | Declarative rules that define what conditions must be met. The "all" type means every condition must pass — like an AND clause in a policy engine. |
type: "sig" condition | Required approver | Specifies a particular key that must sign. Like adding a required reviewer on a pull request. |
type: "before" condition | Expiration / TTL | The transaction is only valid before a certain slot (time). Like setting an expiration on an invite link or a JWT token. |
| CIP-30 browser wallet | OAuth / SSO login | A standardized interface for web apps to interact with user wallets, similar to how OAuth standardizes login flows across identity providers. |
| MeshProvider | Auth context provider (React) | A React context that makes wallet state available throughout the component tree. Identical in pattern to <AuthProvider> or <SessionProvider>. |
| NFT metadata (CIP-25) | Database record / API resource | Structured data attached to the token on-chain. The metadata schema (label 721) is a Cardano standard, similar to how a REST API defines its response schema. |
| Policy ID | Namespace / tenant ID | A unique identifier derived from the minting script. All tokens minted under the same script share a policy ID, like how resources in a multi-tenant app share a tenant ID. |
Partial signing (signTx(tx, true)) | Incremental approval workflow | Each party adds their signature without finalizing. Like a document that collects signatures from multiple stakeholders before submission. |
Source code
The source code for this lesson is available on GitHub.
Challenge
Create a multi-signature wallet requiring 2 out of 3 signers to approve a transaction. Build and sign a transaction with two signers, submit it, and verify success.